Fermented Pickles Beat Hot-Processed Every Time
From Garden to Jar: Why Fermented Pickles Beat Hot-Processed Every Time (Plus an Easy Recipe!)
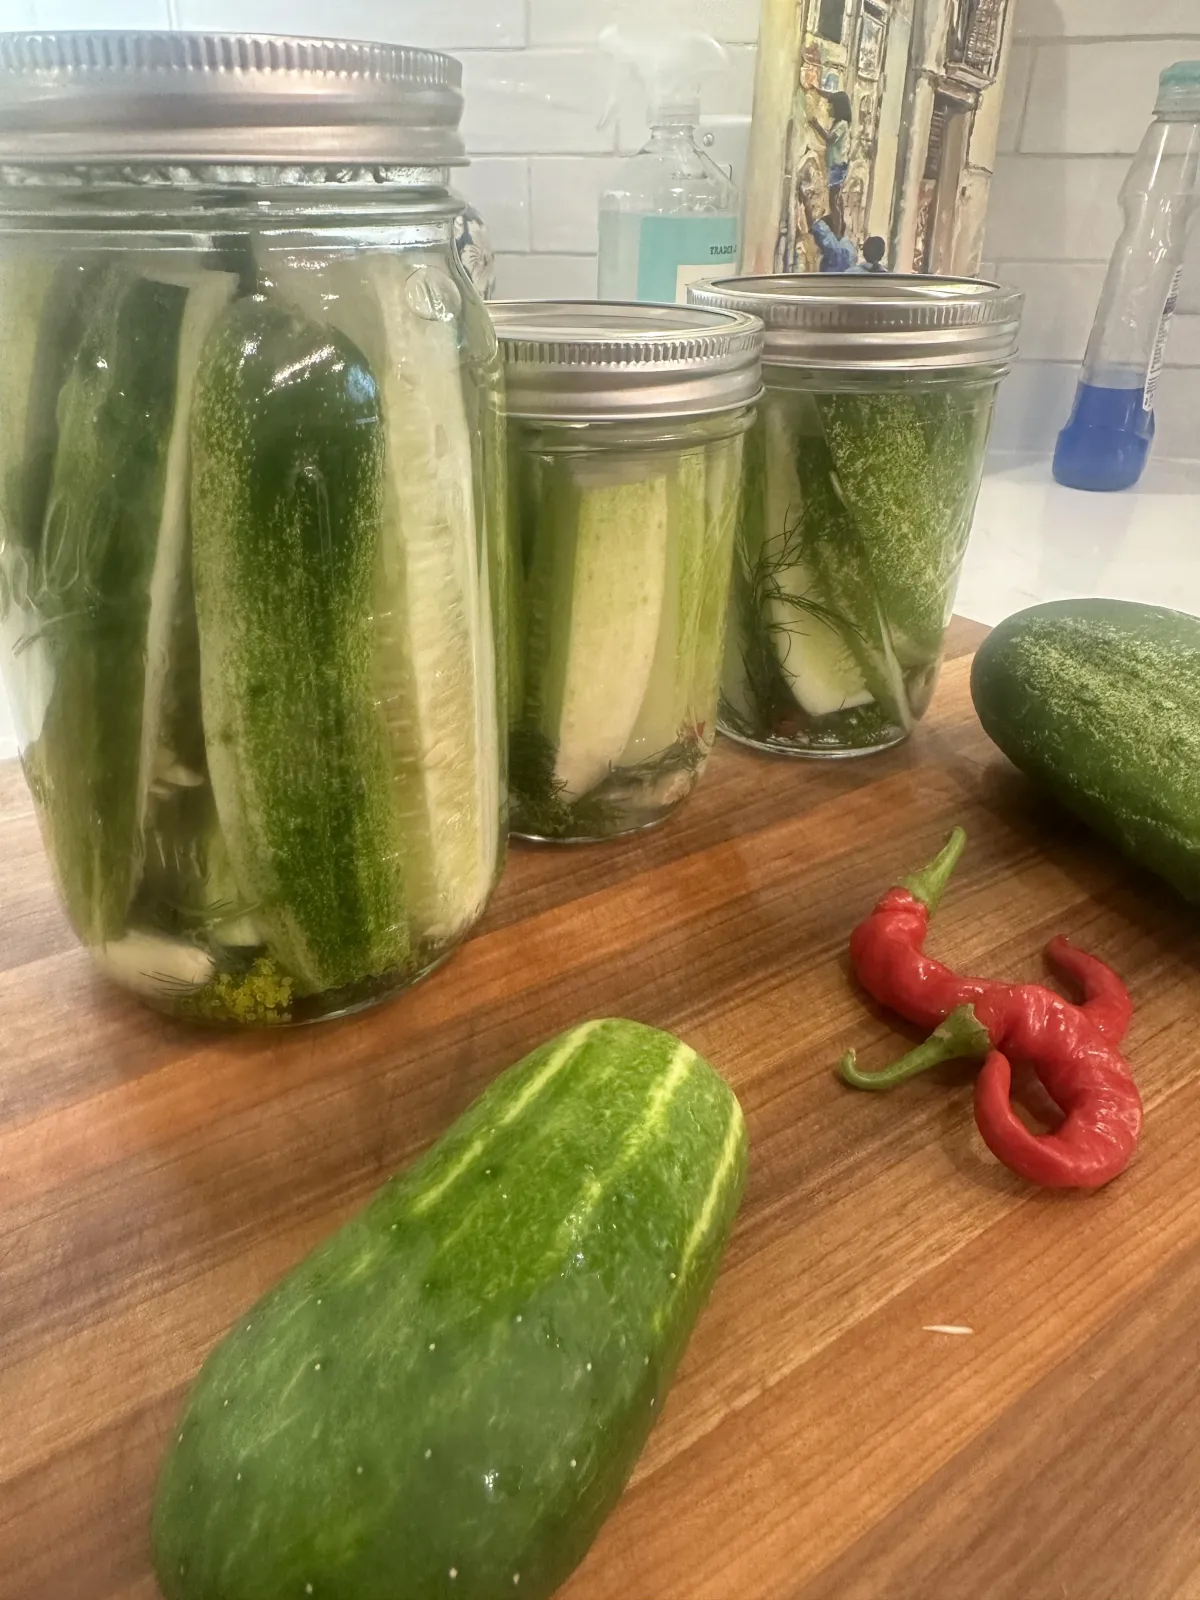
There is nothing quite like the satisfaction of walking out to your garden in the morning, pushing aside prickly green leaves, and harvesting a basket full of crisp, vibrant cucumbers. But if your garden is anything like mine, a successful cucumber season means one thing: an absolute avalanche of produce.
When it comes to preserving that garden bounty, most people automatically think of the traditional water-bath canning method the standard hot-processed pickles. But today, I want to make the case for hitting pause on the boiling water bath and trying something older, simpler, and infinitely better: Fermented pickles.
Here is why fermented pickles are superior to hot-processed pickles, and how you can make your own batch right on your kitchen counter.
Why Fermented Pickles are Better Than Hot-Processed
If you’ve only ever eaten grocery store pickles (which are almost exclusively hot-processed with vinegar), true fermented pickles will be a revelation. Here is why fermentation wins hands down:
1. The Ultimate Crunch
The biggest heartbreak of hot-processed canning is the mushy pickle. Because water-bath canning relies on high heat to sterilize the jars and cook the contents, it inevitably breaks down the cell walls of the cucumber. Fermented pickles, on the other hand, are never heated. They cure at room temperature, keeping that satisfying, snap-in-your-mouth crunch intact.
2. Probiotic Powerhouse
Hot-processed pickles are dead. The heat kills off any bacteria good or bad. Fermentation is a living process. By utilizing a simple salt-and-water brine, you create the perfect environment forLactobacillusbacteria to thrive. These beneficial microbes convert the natural sugars in the cucumber into lactic acid (giving the pickle its sour tang) while flooding your gut with powerful, digestion-boosting probiotics.
3. Deep, Complex Flavor
Vinegar pickles are sharp and acidic, which is fine, but it’s a bit of a one-note flavor. Fermented pickles develop their sourness over days or weeks. The flavor is complex, earthy, slightly fizzy, and deeply satisfying. It tastes like a traditional New York deli pickle because that's exactly what a deli pickle is.
4. No Fancy Equipment (and No Sweaty Kitchen!)
Canning on a hot summer day can turn your kitchen into a sauna. Between the giant boiling pots of water and the precision needed for sealing lids, it’s a chore. Fermentation requires no stove, no specialized canning pots, and zero heat.
The Crunchy Garden Fermented Pickle Recipe
Ready to try it? This recipe is highly customizable, but it gives you the perfect baseline for crisp, sour garden pickles.
Ingredients:
Garden Cucumbers: Pickling varieties (like Boston Pickling or Kirby) work best. Keep them whole, slice them into spears, or cut them into chips.
Water: Non-chlorinated is best (filtered or spring water), as chlorine can inhibit the good bacteria.
Salt: Use sea salt or kosher salt. Avoid iodized table salt, which can turn the brine cloudy.
Garlic: 4–6 cloves, smashed.
Fresh Dill: A generous handful of dill heads or fronds.
The Secret Crunch Weapon: 1 bay leaf and 1/4 teaspoon black peppercorns. (These contain tannins, which naturally keep the cucumbers crisp!)
Optional Spices: 1 tsp mustard seeds, or a pinch of red pepper flakes for heat.
Equipment:
Clean quart or half-gallon glass jars
A fermentation weight (or a small ziplock filled with water)
Instructions:
Prep the Cucumbers:Wash your cucumbers thoroughly.Crucial Step:Slice off the blossom end (the side opposite the stem). The blossom end contains enzymes that can make your pickles soft.
Pack the Jar:At the bottom of your clean jar, drop in your garlic, dill, spices, and your tannin-rich leaf (like a grape leaf). Pack the cucumbers tightly into the jar, leaving about 1 to 2 inches of headspace at the top.
Make the Brine:Create a 3.5% brine by mixing 2 tablespoons of salt into 4 cups (1 quart) of water until fully dissolved.
Pour and Submerge:Pour the brine over the cucumbers until they are completely covered.Everything must stay below the liquid to prevent mold add your fermentation weight on top of the cucumbers to keep them submerged.
Let it Ferment:Cover the jar loosely with a lid (or a cloth secured with a rubber band). Place the jar on a counter out of direct sunlight.
The Wait:Within 2-3 days, you’ll notice the brine getting cloudy and little bubbles starting to rise this is exactly what you want! Start tasting them around day 4 or 5. Once they reach your preferred level of sourness and tang (usually between 5 to 9 days depending on your room temperature), put a tight lid on the jar and move it to the fridge.
Moving them to the refrigerator slows down the fermentation process significantly, allowing you to enjoy your perfectly crunchy, probiotic-rich garden pickles for months to come.
Give it a try this harvest season your gut, and your tastebuds, will thank you!
Shop Doug the FoodGuy Store