From Dirt to Dinner Table
From Dirt to Dinner:
There is a distinct kind of magic that happens in the early hours of a morning spent in the garden. The air is still holding onto the cool crispness of the night and the world is quiet except for the resident birds singing their song.
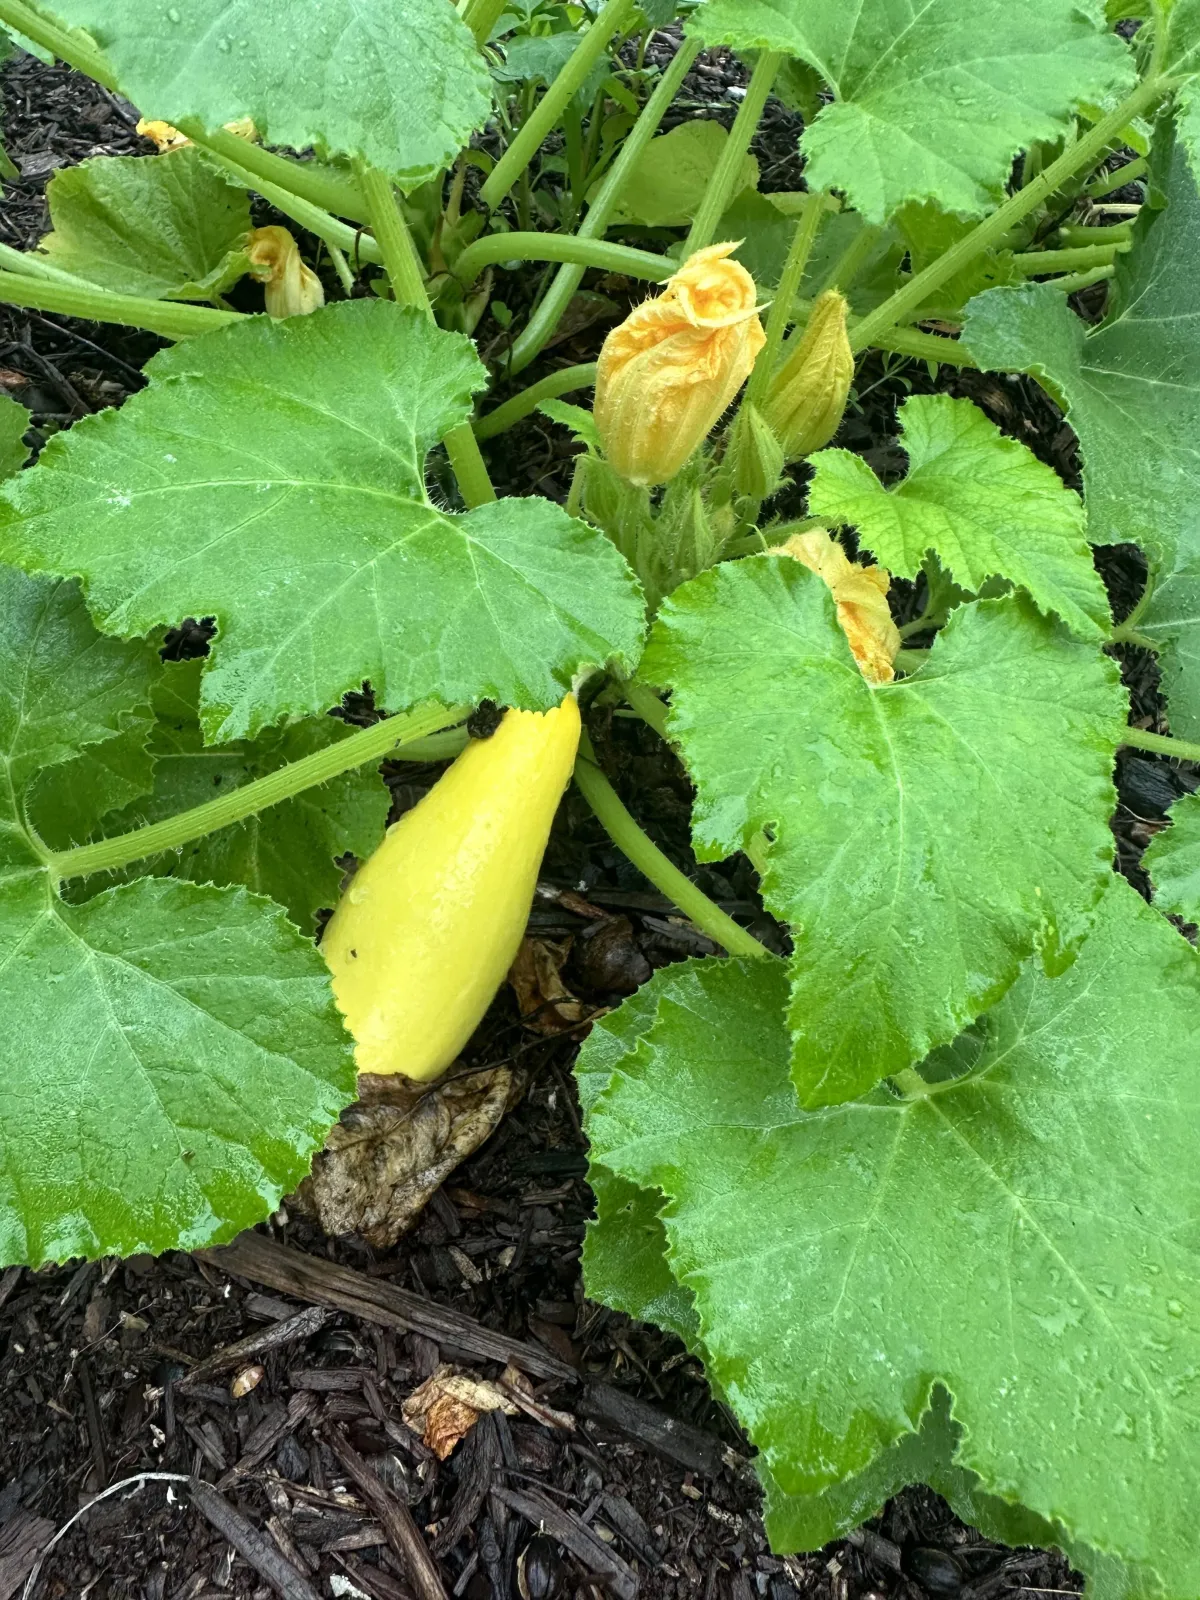
If you’ve ever grown your own food, you know that walking out to your backyard isn't just a chore it’s a treasure hunt. Today, the bounty was clear: the yellow summer squash had practically exploded overnight under their massive, prickly leaves, and the turnip tops were waving a vibrant green flag, signaling that things were getting crowded underground.
Today, we are bringing that garden abundance straight into the kitchen. We’re talking about a comforting, bubbly, buttery southern-style yellow squash casserole and a pot of slow-simmered turnips and greens that will make your house smell like home. Grab your harvest basket, and let’s get to it.
Part 1: The Great Squash
If you have ever grown yellow crookneck squash, you know they possess a superpower: invisibility. You can look at a plant on Sunday, see nothing but yellow blossoms, and return on Monday to find a collection of squash the size of baseball bats.
Stepping into the squash patch requires a little bit of bravery. Those giant leaves are covered in tiny, abrasive hairs that will make your forearms itch if you aren't careful. But pushing those leaves aside to reveal a cluster of bright, sun-kissed yellow squash is pure joy.
For the perfect casserole, you don't actually want the giants. The massive ones tend to be woody and full of large seeds. Instead, we’re hunting for the tender, medium-sized gems about six to eight inches long with smooth, vibrant skin that yields just a little to pressure. I clipped four beautiful specimens, their stems leaking a clear, sticky sap that smells purely of green growth, and laid them gently in the basket.
The Secret to a Non-Watery Squash Casserole
Yellow squash is basically structured water. If you just slice it up and throw it into a baking dish with cheese, you will end up with a sad, soupy mess. Over the years, I’ve learned that the secret to an unforgettable casserole is a two-step moisture reduction process.
Step 1: The Pre-Cook. Slice the squash into even rounds (about a quarter-inch thick) along with a hefty sweet Visalia onion. Sauté them in a skillet with a little butter until they are just beginning to soften and release their juice.
Step 2: The Drain. Dump the sautéed squash and onions into a colander over the sink. Let them sit there for a good ten minutes, pressing down very gently with the back of a woodern spoon to coax out the excess water.
Crafting the Comfort: The Recipe
While the squash is draining, it’s time to build the flavor base. In a large bowl, mix together:
Sour Cream: About cup. This creates the rich, tangy binder.
Cheese: A generous cup of sharp cheddar. Don’t skimp here; the sharpness cuts through the sweetness of the squash.
The Binder: One beaten egg to hold everything together.
The Seasoning: A pinch of garlic powder, plenty of cracked black pepper, and a teaspoon of kosher salt.
Fold the drained squash and onions into this creamy mixture. Turn it all out into a greased baking dish.
Now, for the crown jewel: the topping. A squash casserole without a crunchy top is an unfinished symphony. Crush up a sleeve of Ritz crackers, toss them with two tablespoons of melted butter and a handful of parmesan cheese, and scatter them over the top like blanket.
Bake it at 350°F (175°C) for about 30 minutes until the edges are bubbling fiercely and the cracker crust is a deep, golden brown.
Part 2: Pulling Up the Turnips or whats left
While the casserole is filling the kitchen with the scent of toasted butter and melting cheese, it’s time to head back out for the second half of our menu. Turnips are an underrated garden hero. They thrive when the weather is mild, and they give you two distinct crops for the price of one: the peppery, nutrient-dense greens above ground, and the sweet, earthy roots below.
There is a deeply satisfying, primal rhythm to pulling turnips. You grab the base of the stems right where they meet the soil, give a steady, twisting tug, and pop—the earth releases its hold. Out comes a gorgeous, purple-topped globe dangling a web of fine root hairs coated in dark soil.
For this meal, I pulled a half-dozen medium turnips. They should feel heavy for their size; heavy turnips mean they are juicy and crisp inside, not hollow or pithy.
A Gardener's Note: Don’t separate the greens from the roots until you’re ready to clean them. Keeping them attached helps preserve the moisture in both parts while you transit from the garden plot to the kitchen sink.
Part 3: The Art of Cleaning and Cooking Greens
Let’s be honest: cooking turnip greens is a labor of love, and 90% of that labor happens at the sink. Greens grow close to the ground, and their wrinkled leaves are expertly designed to trap sand and grit. There is nothing worse than biting into a tender leaf of greens only to feel a crunch of dirt.
The Deep Clean Method
To wash greens properly, fill your sink entirely with cold water. Cut the leaves away from the turnip roots, and slice out the thick, woody central stems from the larger leaves. Submerge the greens in the water, swishing them around vigorously.
Let them sit for a few minutes. The magic of this method is that the dirt and sand will sink to the bottom of the basin while the greens float. Lift the greens out of the water into a colander, drain the sink, wipe out the grit, and repeat the process at least two more times. If the water at the bottom of the sink is completely clear, you are ready to cook.
Simmering the Turnips and Greens
While the greens are draining, cut the turnip roots. Slide your knife through that purple and white skin to reveal the stark, snowy-white flesh beneath. Cut them into bite-sized wedges.
True southern greens require a savory, smoky fat source to balance their natural bitterness. In a large, heavy-bottomed Dutch oven, render down a few slices of thick-cut bacon. Once the fat is coating the bottom of the pot, toss in a diced onion and let it soften. Pack the damp greens into the pot. They will look like an absolute mountain, threatening to overflow, but don’t panic they wilt down to a fraction of their size within minutes. Stir them into the smoky fat, then add the diced turnip roots.
Pour in just enough chicken stock to halfway submerge the greens. Toss in a pinch of red pepper flakes for warmth, and a tiny teaspoon of sugar to mellow out the turnip's bite. (Side note when you take the trip to the store for that one item you missed plan to stay for a bit and talk to friends doing the same thing)
Cover the pot, turn the heat down to low, and let it simmer. Give it at least 45 minutes to an hour. You want the greens to be melt-in-your-mouth tender, and the turnip roots to be translucent and soft enough to crush with a fork.
The Gathering: Garden to Table
When everything is finished, the table becomes a canvas of contrast. On one side, you have the squash casserole rich, decadent, sweet, and cloaked in a buttery, crunchy crust. On the other side, you have the turnips and greens—deeply savory, smoky, slightly tangy, and pooling with "potlikker" (the intensely flavored broth left behind in the pot, which practically begs to be soaked up with a piece of cornbread).
Eating a meal where you can trace every single bite back to a specific patch of soil in your backyard changes things. It connects you to the seasons, forces you to slow down, and rewards your patience with flavors that a grocery store shelf simply cannot replicate.
The squash is sweet because it was ripening in yesterday’s sun; the turnips are crisp because they were nestled in the cool earth just an hour ago. It’s simple, honest, hard-earned food—and it doesn’t get any better than that.